WordPress User Enumeration via the REST API: What It Is and How to Stop It
User enumeration is one of the first steps an attacker takes before attempting a brute force attack on a WordPress site. The goal is simple: collect a list of valid usernames. With a confirmed username in hand, the attack surface collapses from guessing both username and password to guessing only the password.
WordPress has shipped a built-in user enumeration vector since version 4.7: the REST API’s /wp/v2/users endpoint. It’s enabled by default, requires no authentication, and returns a list of public user profiles — including the login username.
What /wp/v2/users Returns
Make a GET request to https://yoursite.com/wp-json/wp/v2/users and you’ll get a JSON response that looks something like this:
[
  {
    "id": 1,
    "name": "Martin",
    "slug": "martin",
    "link": "https://yoursite.com/author/martin/",
    ...
  }
]
The slug field is the login username. On most WordPress installations, the admin account has ID 1, and its slug is exactly the username you’d type into the login form.
This is public information. No authentication required. No rate limit. No log entry in a default WordPress installation.
Why This Matters
WordPress login attempts are already one of the most common attack patterns on the web. Bots continuously scan for /wp-login.php and xmlrpc.php. What user enumeration does is remove one layer of uncertainty from that process.
Without a valid username, an attacker has to guess both fields. With a username confirmed via the REST API, they only need the password. Combined with a leaked password list — or a credential stuffing attack — a confirmed username significantly raises the probability of a successful breach.
If your site has a user named admin, and that account has administrator privileges, you have a higher-value target than you might realize.
How to Block the /wp/v2/users Endpoint
The cleanest fix is to disable the route directly using WPBuoy Endpoint Manager. Here’s how:
Step 1: Install WPBuoy Endpoint Manager
Install the plugin from the WordPress plugin repository. After activation, go to Settings → Endpoint Manager.
Step 2: Find the wp/v2 Namespace
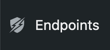
Endpoints are grouped by namespace in a collapsible accordion. Expand the wp/v2 section. You’ll see all WordPress core routes listed — posts, pages, media, comments, categories, tags, and users.
Step 3: Preview the Route First
Click the Preview button next to /wp/v2/users to open its current JSON response in a new tab. Confirm the data it returns. On most sites, this will show your admin username and any other public user accounts.
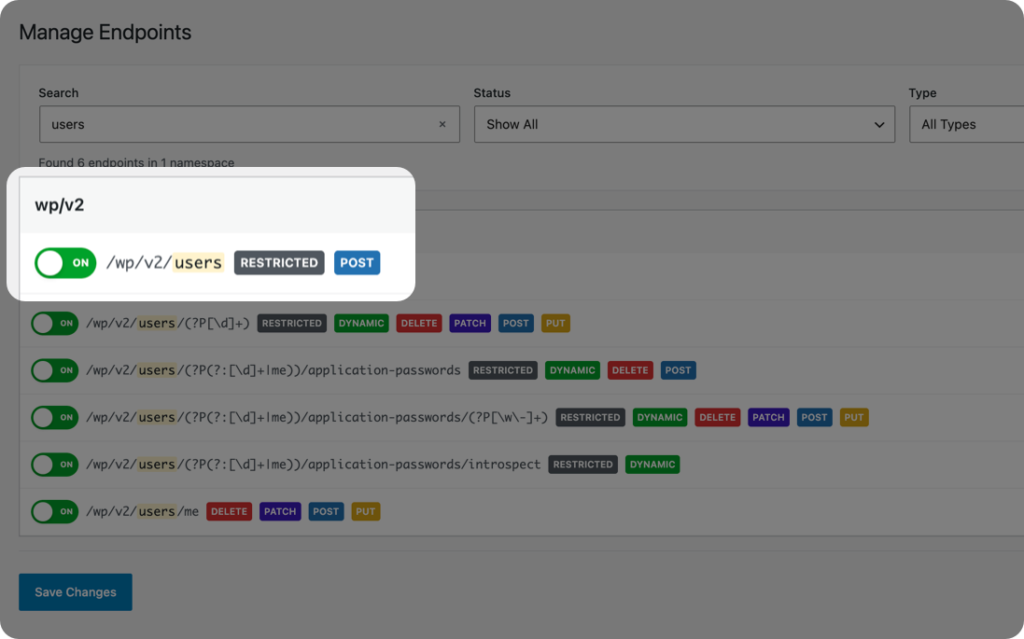
Step 4: Toggle It Off
Toggle the /wp/v2/users route to disabled. The plugin will show a confirmation dialog before saving, since blocking a live endpoint is a change worth confirming. After saving, the endpoint returns 403 Forbidden to any request — authenticated or not — until you re-enable it.
The namespace badge updates to reflect one disabled endpoint in the wp/v2 group, so you have a quick reference that the route is blocked without needing to expand the accordion every time.
What Else to Check in the wp/v2 Namespace
While you’re in the wp/v2 namespace, consider whether any of these routes have a legitimate public use on your site:
- /wp/v2/posts — Returns your published posts. If your site is private or content is behind a paywall, this leaks it.
- /wp/v2/media — Returns your media library. An unnecessary public index of your uploads.
- /wp/v2/comments — Returns comments, including commenter names and emails. If comments are disabled, the route serves no purpose.
Use the Preview button on each one to see what it actually returns on your site before deciding to block it.
Track Blocked Endpoint Hits with Security Logs (Pro)
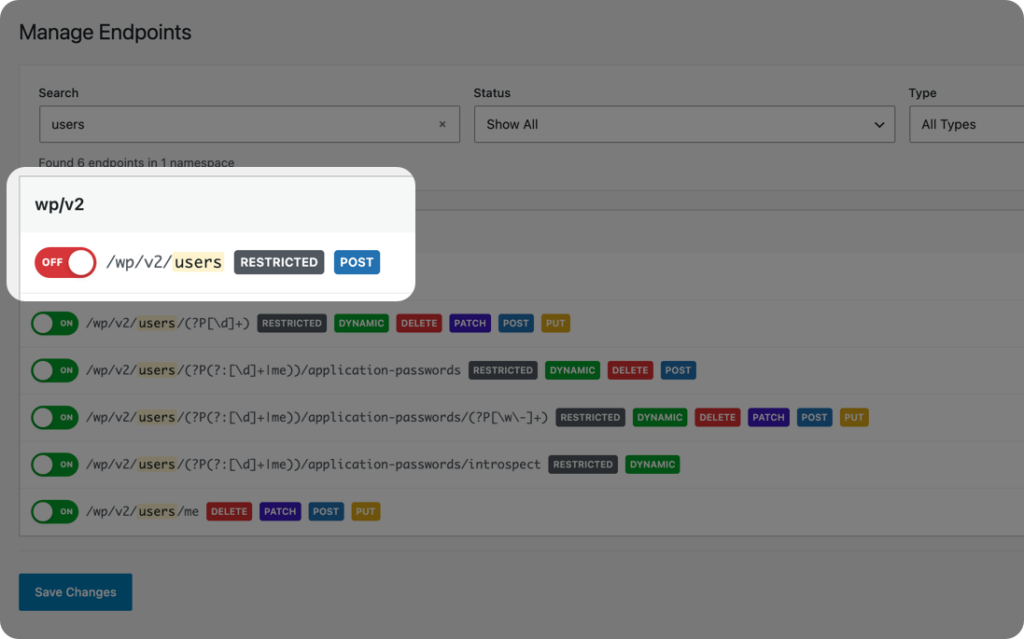
Blocking the endpoint stops the exposure, but it doesn’t tell you whether anyone was probing it. Endpoint Manager Pro adds a security log that records every request that hits a blocked endpoint.
Each log entry captures:
- IP address of the requester
- The blocked endpoint that was hit
- User agent string
- Timestamp
You can filter logs by IP address, endpoint, or date range. If you see a single IP making repeated attempts against /wp/v2/users after you’ve blocked it, that’s a pattern worth acting on. Logs are exportable to CSV for further analysis or for sharing with a hosting provider. They auto-purge after 30 days to keep your database clean, and you can clear them manually at any time.
Other Hardening Steps Worth Taking
Blocking /wp/v2/users removes the easiest username disclosure vector, but it’s not the only one. Author archive URLs (/author/username/) also expose slugs by default. If user enumeration is a concern for your site, pair this fix with disabling author archives or ensuring your author slugs don’t match your login usernames.
WPBuoy Endpoint Manager handles the REST API side. For the author archive side, a separate redirect rule or plugin is needed — the two approaches cover the same problem from different angles.
Block It Now
There’s no performance cost, no plugin conflict risk, and no functional downside to blocking /wp/v2/users on a public-facing WordPress site. The endpoint serves no legitimate purpose for unauthenticated visitors. Five minutes of configuration removes a data leak that’s been enabled by default for nearly a decade.
Download WPBuoy Endpoint Manager free from WordPress.org, or upgrade to Pro to add security logging and dynamic route support.